Wednesday, October 30, 2013

Fingerless Gloves Update


a little update on the fingerless gloves project. the new style bobble stitch glove is finished, yay! it's longer and I like the stitching better. I will probably just add a half thumb and that's it. I love how the variegated invicta colour yarn from Scheepjeswol shows it's colours. however, when looking at the wave stitch glove in progress below, I have a feeling I might like that too. or even better? let's see how it progresses.


I will share the pattern for the bobble stitch glove here next week and I am still working on the wave or shell stitch one. it's a challenge thats for sure! but the kind of challenge I enjoy a lot.


Monday, October 28, 2013

Dutch Design Week 2013


after quite a stormy weather day here in The Netherlands, an update on what's going on here. a few more pictures than I posted on my creJJtion Instagram account, some of them I posted over at the Gatherings Magazine account @gatheringsmag. there are some other talented ladies posting there as well, it's worth having a look!

last Friday I went to the Dutch Design Week 2013 with my mom. we visited the graduation show at de Witte Dame and it was, as usual, great to see what the graduates came up with this year.


above: the result of crocheting (or weaving) with two tone twined yarn, making the unpleasant a little pleasant by covering a medicinal infusion bottle in a pretty crochet wrap, a fantastic two seating knitting bench with baskets full of supplies aiming to have mentally ill people connect through their knitting, and pretty tassels

below: more weaving with great results, nice colours and another view of the knitting two-seater cart


it was great to be inspired by new use of materials, colour combinations, textures and purposes. have you been there last week? how did you like it?

this week I'll be away from my computer a lot, road tripping in The Netherlands and even going to Berlin for a few days. busy and exciting, I'll report about it all next week. by the way, it has been about 15 years since we visited Berlin. your tips and ideas on places to see and visit in Berlin are more than welcome!

have a great week 


Thursday, October 24, 2013

Simply Haken


these days I get a lot of questions that relate to the difference between Canada and the Netherlands, but also about the difference between the Netherlands before and after our move. my answer differs from day to day depending on what I experienced and on what subject. 

when it comes to crochet and crafts the answer is always the same. SO MUCH changed in the Netherlands while I was away. it seems now yarn, crochet and other crafts too are everywhere. from yarn in stores where I never saw it before, like HEMA, but also TV commercials from Zeeman about their new yarn collection. I have not been on a train yet, but I image I will no longer be the only one crocheting there. I see crochet and knitting clubs, get togethers and beautiful creations on Instagram. 

Mollie Makes magazine translated to Dutch, and recently the new magazine Simply Haken #1 was published. it is a sister magazine to Simply Breien (knitting). so I decided to see what this glossy has to offer. the name is literally translated from the English Simply Crochet, however their content is different. this first issue features Dutch designers like the lovely and talented Annemarie who designed a cute toadstool and gnome. 

despite the projects I have on the go, my hands were itchy to try out some patterns. I got out my bucket of yarn scraps and left over pieces from projects, and tried out a square and doily from this issue. when  a package was delivered, wrapped in brown paper, I got an idea: the oil crayons came out and I drew some more 'crocheted' squares and finished the doily on paper.


I struggled while figuring out the crochet square pattern, however more with cotton than with wool. funny right, how different material can give a different feel to a project while you're working on it. I like the look of these squares, and how the inner square is twisted from the outer square. I don't like how the 3rd row (green and grey in the samples) goes over the previous clusters of 5 treble crochet and sort of squeezes them in. I'd probably redesign the 2nd row to overcome the squeezing. but that's personal preference of course. it would probably look the same when the square is finished.


the doily is not quite finished yet, however I enjoy playing with the different colours. the pattern seems nice too so far, since I love me some good amount of scallop edgings haha.


I really like this brown paper designing, it saves me time and I love to draw, so that's a win win you'll probably see more often here from now on!

to finish my comment on the Simply Haken magazine, I like it. it is absolutely packed with designs, ranging from easy to complicated. it helps me get back into Dutch crochet terms and I love how it presents Dutch crochet designers and their work. the lay out of the magazine is a little 'busy' to my taste, however it's better on the pages than it is on the cover. I'd say Dutch ladies, get your copy and give it a go! would be great to hear your opinions.


Wednesday, October 23, 2013

Fingerless Gloves ~ Progress


an update on the fingerless gloves in progress. last week I showed you some samples in this post, I was trying to figure out what stitch to use for this project and invicta colour yarn by Scheepjeswol

I ended up making one glove with thumb (to the right in the picture below). I like it, however it is too short to my liking and I am not a big fan of the 'lines' in between the bobble stitches. as a result, I started a longer glove without the lines (left). a few more rows till I am finished. question is: to crochet a thumb or not to crochet a thumb? what is your idea on that? 

and I couldn't resist starting a second design with the wave pattern (middle), but it is quite the puzzle. I have said some nasty words in the past few hours to get it right. it is too wide for my wrist now, so I have to unravel it one more time I hope. and then let's see how that one will work out.


in the mean time I am still struggling with the saturation and other settings of the photo's of this project, I hope it doesn't hurt your eyes too much looking at these images on your screen...


oh and don't you like these rather special ranunculus? I had never seen them before and like their frills.

Tuesday, October 22, 2013

My First Potholders and a little tutorial


there has to be a First for everything, right? after I made doilies and felt like a granny at the age of 31, I thought potholders could do no harm. after I finished this blanket, I figured what to do with the left over yarn. I always wanted to try the fabulous pattern of the Maybelle Crochet Flower by the lovely Annette from the pretty Scandinavian Homespun blog My Rose Valley

after I finished the dark blue flower I instantly had to make another one, boy is this pattern addictive! and then I had two beautiful flowers + not too many yarn left. what to do? I really saw only one solution: to make potholders of them. because after all, every blanket needs matching potholders, no?


I went back to Annette's blog and found this tutorial on how to make a square around the flower. that pattern is so well done and well thought through, it really defines the flower more than anything. it's gorgeous don't you think?


ideally I would have used one colour for both backsides, however I was using scraps and had to come up with a multi colour solution to get the second one finished. there literally is no single centimetre of yarn left, I used it to the last bit to be able to finish the second potholder.

in case you are interested, here's a little write up of how I made these potholders with Drops Paris yarn:

front: follow the pattern for the flower here and for the square here.
back: make a chain of 20 stitches, add 11 rows of double crochet. then add a row of double crochet all around the square: along the top and the bottom, one dc per stitch. along the sides, 2 dc per dc. in the corners, 4dc.
edging: put the front and back of the potholder together, by starting at a corner, making single crochet in every stitch all around and picking up only the inside loop of each stitch. that way your edge is not getting super thick and I like the way it defines the stitches from the last row of double crochet. at the end when you're back at the corner, make a loop of 12 chain stitches (or as long as you desire your loop to be), turn and make 18 single crochet around the loop, or as much as needed to cover the chains.


I hope this last picture gives you a little bit of reference to their size, they are quite large measuring 17 square centimetres, or 7 square inches. I love this size when I am using them in my kitchen, however if you like them to be smaller just use a lighter weight yarn and they will turn out smaller.

thank you so much my dear Annette for writing up this beautiful tutorial for the Maybelle Crochet Flower pattern and square, I adore it and will for sure make more of them in the future xx

Monday, October 21, 2013

Organizing


thank you all so much for your comments and love for the finished blanket I posted last week. they mean the world to me, your words are so motivating. hugs, kisses and thank you!

let me show you some Instagram shots from last week:

tea and mini cakes with grandma, flower shop display, image from last year, walnuts from the backyard

hello there this is me :) I needed a new head shot, fingerless gloves in the making, blanket finished

doily love pattern by Emma Lamb in this book, behind the scenes, first pumpkin soup of the season and dreamy rose


and last but not least: a super scary shot of my full and messy craft room/ studio/ work space. ahum. let's call this the 'before' picture. with the super high ceilings, original 1915 wooden floor, 2 large windows and lots of square meters it makes for one dreamy room. at the same time it is a puzzle to put the furniture pieces together in a way that makes it a cozy place too. while organizing I am fighting the battle whether I have too less storage space or too much stuff... I am leaning towards the latter and that might result in a give away soon.

this picture was taken on Friday. some organizing took place this weekend and furniture pieces were shuffled around a bit. to keep myself motivated, I will promise to post a progress picture every Monday in the coming weeks. because after all: it could only get better than this!

also, for the crocheters among my readers: look for a bit of gorgeous vintage inspiration here
and this little video put a smile on my face, I found it through Mollie's site


happy Monday to you!

Friday, October 18, 2013

Blanket Tadaa and Pattern


it is by far the blanket I worked the most on, in the least time. from start to finish within a week. I am starting to think whether I slept or ate that week, or even talked to my husband. but, we are both pleased with the result, a lovely blanket that lives on the couch in our new home. it measures 80x125cm. it already has a nickname too, the king blanket. for some reason the bobbles around it make it look like a king's royal robe, a lovely luxurious feeling.

let's list a few facts:
made out of Drops Paris yarn #16 white, #27 peach, #41 mustard and #48 petrol,  6 skeins of each colour and an additional 2 petrol skeins for the edging. with the left over yarn I made two potholders, and six multi coloured squares which I donated for a warm blanket for people who are very ill.
hooked with a 5 mm hook following this pattern and joined them this way. below these images you will find a little picture tutorial for the edging.


it was hard to get a full-size picture of the blanket, but I managed to do so while standing on a chair. it looks rather small this way haha.

let's get to the edging pattern. as with any new pattern, it is a matter of trial and error for me. this blanket was no exception, in total I must have made about 3 or 4 extra rounds of edging that I frogged because the result was not to my liking. for me, one of the goals with the edging around squares is to go from that slightly wavy edge to a straight one. I love how it turned out really well this time and you can see the edge getting more and more straight with every new round.

crochet pattern tutorial for a blanket edging in both English and Dutch


1 ~ attach the yarn in any gap between two clusters along a square on the edge. single crochet, *chain 2, single crochet in the next gap* repeat pattern between * along the complete edge of the blanket, join with slip stitch in first single crochet. connection between the squares: single crochet in first corner, single crochet in next corner. NO chain stitches in between. corners: single crochet, 2 chain, single crochet.
1 ~ start met het blauwe garen in een opening tussen twee clusters aan de rand van een willekeurig vierkant. haak een vaste, *2 losse, vaste in de volgende opening* herhaal tussen * langs de totale rand van de deken. sluit met een halve vaste in de eerste vaste. overgang tussen de vierkanten: vaste in de eerste hoek, vaste in de tweede hoek. dus GEEN losse ertussen. hoeken: vaste, 2 losse, vaste.

2 ~ make a slip stitch into the next gap, chain, single crochet in the same gap. continue with 2 single crochet in every gap. join with slip stitch in first chain. where the squares connect: 1 single crochet in the gap. corners: single crochet, chain 1, single crochet. this row may seem a little tight, but it helps tremendously in creating a nice and straight edge.
2 ~ maak een halve vaste in de volgende opening, losse, vaste in dezelfde opening. ga verder met 2 vaste in iedere opening. sluit met een halve vaste in de eerste losse. op de overgang tussen de vierkanten:  vaste in de opening. hoeken: vaste, 1 losse, vaste. deze rij is wat aan de strakke kant, maar dat helpt om een mooie rechte rand te maken.

3 ~ chain 2, double crochet in every stitch around the blanket. join with slip stitch in second chain of first stitch. corners: 2 double crochet in first single crochet from previous row, chain 2, 2 double crochet in next single crochet from previous row. makes a total of 6 corner stitches.
3 ~ 2 losse, stokje in iedere steek rondom de deken. sluit met een halve vaste in de tweede losse van de eerste steek. hoeken: 2 stokjes in de eerste vaste van de vorige rij, 2 losse, 2 stokjes in de tweede vaste van de vorige rij. maakt een totaal van 6 hoeksteken.

4 ~ chain 2, half double crochet in every next stitch around the edge. close with slip stitch in second chain of first stitch. corners: 2 half double crochet in the two middle corner stitches, number 3 and 4. cut thread and fasten off.
4 ~ 2 losse, half stokje in elke steek van de rand. sluit met een halve vaste in de tweede losse van de eerste steek. hoeken: 2 halve stokjes in de twee middelste hoeksteken, nummer 3 en 4. knip de draad door en werk het draadeinde weg.

5 ~ turn the blanket around, back side facing you. attach the yarn in any half double crochet from the previous row, make bobble stitch. *slip stitch, single crochet, slip stitch, bobble stitch* repeat between * all around the blanket. close with slip stitch into last stitch before first bobble, cut thread and fasten off. bobble stitch = *yarn over, put hook in stitch, pull through, yarn over, pull through 2* leaving 2 loops on hook. repeat between * 3 times, you now have 5 loops on hook. yarn over, pull through all loops in once. 
5 ~ draai de deken om, je kijkt nu naar de achterkant. maak het garen vast in een willekeurige steek van de vorige rij, maak een bobbel steek. *halve vaste, vaste, halve vaste, bobbel steek* herhaal tussen * langs de rand van de deken. sluit met een halve vaste in de steek voor de eerste bobbel, knip het draad door en werk het draad einde weg. bobbel steek = *haal de draad om de naald, steek de naald in de steek, haal de draad om de naald en terug door de steek, haal de draad om de naald en door 2 lussen op de naald*, je hebt nu 2 lussen op de naald. herhaal tussen * 3 keer, je hebt nu 5 lussen op je naald. haal de draad om de naald en in 1 keer terug door alle lussen op de naald.

and congratulations, your blanket is done! finished!

image 6 is just showing you a close up of the back side of the finished edging.


I hope you will enjoy following this tutorial as much as I did designing and explaining it. if anything is unclear to you or if you have any questions, please let me know through a comment on this post or through email, my address is to be found at the bottom of this page.


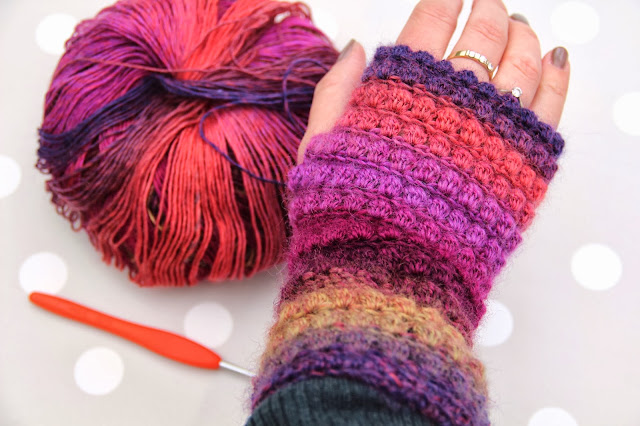
a little behind-the-scenes shot

happy crocheting!